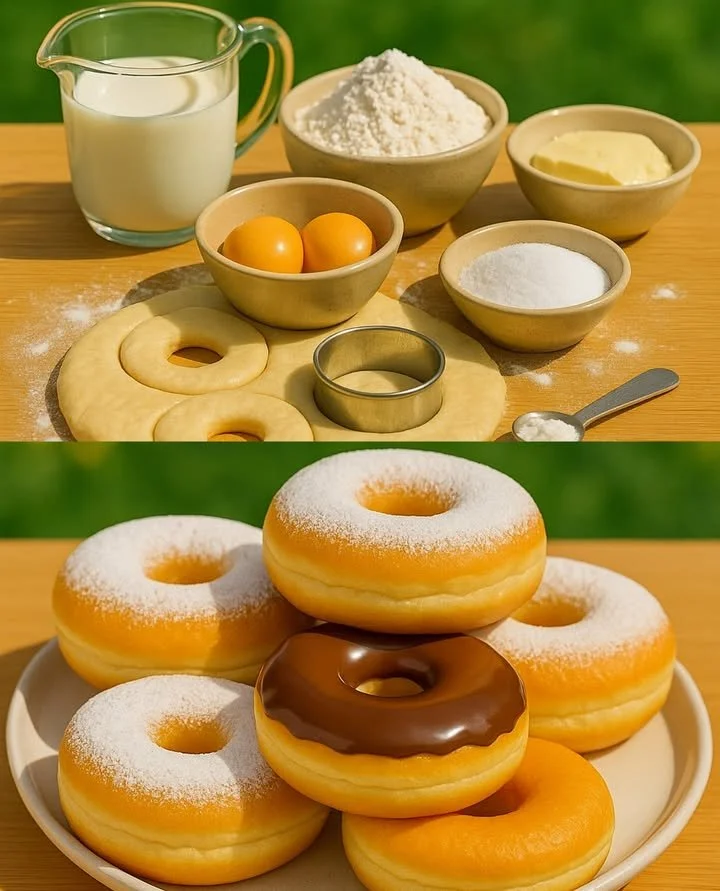
Author: Maria

  • Oven Doughnuts

    Oven Doughnuts

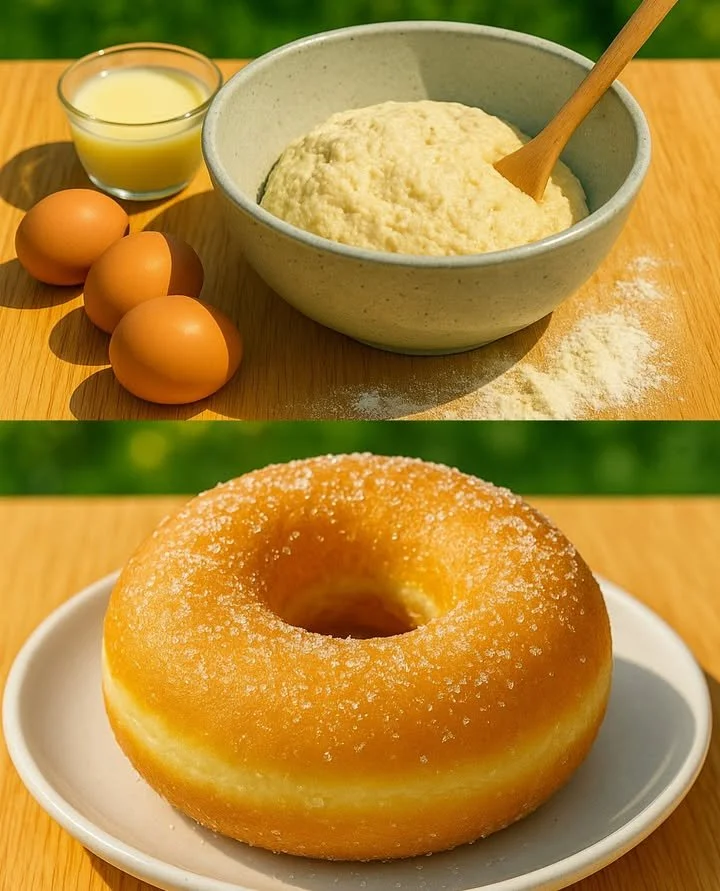
    Oven doughnuts are a delicious and healthier alternative to traditional fried doughnuts. These baked treats are easy to make and can satisfy your sweet cravings without the mess of frying. With a soft, fluffy texture and endless topping options, oven doughnuts are perfect for breakfast, snacks, or any special occasion. This article will guide you through the simple steps to create your own batch of oven doughnuts that everyone will love.

    Ingredients:

    1 cup of whole milk, warmed to about 110°F (250 ml, 43°C)
    2 1/4 teaspoons of active dry yeast
    1/3 cup of sugar (67 g)
    2 large eggs
    6 tablespoons of unsalted butter, softened (85 g)
    4 cups of all-purpose flour, plus more for dusting (500 g)
    1/2 teaspoon of salt
    Vegetable oil, for frying
    Optional toppings: powdered sugar, glaze, or cinnamon sugar

    Directions:

    1. In a small bowl, combine the warmed milk and yeast. Let it sit for about 5-10 minutes until frothy.
    2. In a large bowl, mix together the sugar, eggs, and softened butter.
    3. Add the frothy yeast mixture to the bowl and stir to combine.
    4. Gradually add the flour and salt, mixing until a dough forms.
    5. Knead the dough on a floured surface for about 5-7 minutes until smooth.
    6. Place the dough in a greased bowl, cover, and let it rise in a warm place for about 1 hour or until doubled in size.
    7. Preheat your oven to 375°F (190°C).
    8. Roll out the dough to about 1/2 inch thickness and cut doughnuts using a doughnut cutter or two round cookie cutters.
    9. Place the doughnuts on a baking sheet, cover, and let them rise for another 30 minutes.
    10. Bake the doughnuts for 10-12 minutes until lightly golden.
    11. Allow to cool slightly, then coat with your choice of toppings such as powdered sugar, glaze, or cinnamon sugar.

    How to serve Oven Doughnuts

    Enjoy your oven doughnuts fresh out of the oven. They can be served warm or at room temperature. These doughnuts pair well with coffee or milk. You can serve them plain, sprinkle them with powdered sugar, or drizzle with glaze for extra sweetness. For a delightful twist, try rolling them in cinnamon sugar. No matter how you choose to serve them, oven doughnuts will always be a crowd-pleaser!

  • How to Make Donuts So Good You May Never Buy Them Again

    How to Make Donuts So Good You May Never Buy Them Again

    Making your own donuts at home can be a delightful experience. Forget about store-bought options when you can whip up a batch of fresh, warm donuts in your kitchen. This recipe for homemade donuts is simple and quick, offering a delicious treat that you can customize to your liking. Once you try these donuts, you may never want to buy them again!

    Ingredients:

    1 cup milk (240 ml),
    1/4 cup white sugar (50 g),
    2 1/4 teaspoons active dry yeast (7 g),
    2 large eggs,
    1/2 cup butter, melted (115 g),
    4 cups all-purpose flour (500 g),
    1/2 teaspoon salt (3 g),
    Oil for frying,
    1 cup powdered sugar (120 g)

    Directions:

    1. Warm the milk slightly and dissolve the sugar in it. Add the yeast and let it sit for about 5 minutes until foamy.
    2. In a bowl, mix together the eggs and melted butter. Add the milk mixture once it’s ready.
    3. Gradually add the flour and salt, mixing until a dough forms. Knead the dough on a floured surface until smooth, about 5-7 minutes.
    4. Place the dough in a greased bowl, cover it with a cloth, and let it rise in a warm place until doubled in size, about 1 hour.
    5. Roll out the dough to about 1/2 inch thickness and cut out donuts using a donut cutter or two different-sized round cutters.
    6. Heat oil in a deep fryer or heavy pot to 375°F (190°C). Fry the donuts, a few at a time, until golden brown, about 1-2 minutes on each side.
    7. Remove the donuts from the oil and drain on paper towels.
    8. While still warm, toss the donuts in powdered sugar or glaze them as desired. Enjoy your homemade donuts!

    How to serve How to Make Donuts So Good You May Never Buy Them Again

    Serve your homemade donuts warm or at room temperature. Pair them with coffee or tea for a delightful breakfast or snack. You can also add various toppings like chocolate glaze, sprinkles, or fresh fruit to cater to different tastes. Making donuts at home not only brings joy but also allows you to enjoy this classic treat whenever you crave it. Enjoy your creation and impress your family and friends!

  • Crispy Polish Potato Pancakes

    Crispy Polish Potato Pancakes

    Crispy Polish Potato Pancakes are a delicious treat that everyone can enjoy. These savory pancakes are crispy on the outside and soft on the inside. This recipe is easy to follow and perfect for any occasion. Serve them as a snack or a side dish.

    Ingredients:

    • 4 medium potatoes, peeled and grated (about 600 grams)
    • 1 small onion, grated (about 100 grams)
    • 2 eggs
    • 3 tbsp all-purpose flour (about 30 grams)
    • 1/2 tsp salt (about 3 grams)
    • 1/4 tsp pepper (about 1 gram)
    • Oil, for frying

    Directions:

    1. In a large bowl, combine grated potatoes and onion.
    2. Add the eggs, flour, salt, and pepper to the mixture and stir until well combined.
    3. Heat oil in a frying pan over medium heat.
    4. Scoop a spoonful of the mixture and flatten it into a pancake shape.
    5. Fry each pancake for about 3-4 minutes on each side or until golden brown.
    6. Drain on paper towels and serve hot with sour cream or applesauce.

    How to serve Crispy Polish Potato Pancakes

    Crispy Polish Potato Pancakes are best served hot. Pair them with a dollop of sour cream or a side of applesauce for extra flavor. These pancakes also make a great addition to breakfast, lunch, or dinner. Enjoy this delightful dish with family and friends for a warming and filling meal.

  • Chinese Fried Breadsticks

    Chinese Fried Breadsticks

    Chinese Fried Breadsticks, also known as "Youtiao," are a popular snack and breakfast food in China. These crispy and fluffy breadsticks are simple to make and pair perfectly with soy milk or congee. Enjoying these fried delights is a delightful experience, filled with flavor and texture. This recipe will guide you through making your own Chinese Fried Breadsticks right at home.

    Ingredients:

    • 500g bread flour (4 cups)
    • 3g salt (½ teaspoon)
    • 6g sugar (1 teaspoon)
    • 10g instant yeast (2 teaspoons)
    • 1 egg
    • 270g warm water (1 cup)
    • 30g cooking oil (2 tablespoons)

    Directions:

    1. In a large bowl, combine the bread flour, salt, sugar, and instant yeast.
    2. Add the warm water and egg, and mix until a dough forms.
    3. Knead the dough on a floured surface for about 10 minutes until smooth.
    4. Place the dough in a greased bowl, cover it, and let it rise for about 1 hour or until doubled in size.
    5. Once risen, punch down the dough and divide it into equal pieces.
    6. Roll each piece into a long shape, approximately 1cm thick.
    7. Heat cooking oil in a deep fryer or pan.
    8. Fry the breadsticks until golden brown, about 3-4 minutes per side.
    9. Remove and drain on paper towels.
    10. Serve warm.

    How to serve Chinese Fried Breadsticks

    Chinese Fried Breadsticks are best served warm. You can enjoy them plain or dip them in soy milk or soup. They make an excellent addition to breakfast or a tasty snack at any time of the day. Their crispy exterior and soft interior create a delightful contrast that everyone will love. Serve them fresh for the best taste experience!

  • Chili Cheese Dog Casserole

    Chili Cheese Dog Casserole

    Chili Cheese Dog Casserole is a delightful dish that brings together the savory flavors of chili and hot dogs, all topped with gooey melted cheese. This easy casserole is perfect for family dinners, potlucks, or game-day gatherings. With simple ingredients and straightforward preparation, you can whip up this hearty meal in no time. Whether you are a fan of comfort food or just looking for something quick and delicious, this recipe is sure to satisfy.

    Why make this recipe

    There are many reasons to make Chili Cheese Dog Casserole. First, it is an easy recipe that requires minimal cooking skills. If you can brown meat and mix ingredients, you can make this casserole. Second, it is a crowd-pleaser. From kids to adults, everyone loves the combination of chili, hot dogs, and cheese. Third, it is a versatile dish that you can customize according to your taste preferences. You can add vegetables, change the type of meat, or adjust the spice level. Lastly, it is a budget-friendly meal that feeds several people, making it great for families or gatherings.

    How to make Chili Cheese Dog Casserole

    To make Chili Cheese Dog Casserole, you will need to follow some simple steps. The preparation is quick and involves basic cooking techniques. Start by preheating your oven, then brown the ground beef. After that, mix in the chili ingredients and let them simmer. Spread the chili mixture in a baking dish, insert the hot dogs, and top it all with shredded cheese. Bake until everything is bubbly and golden brown, and you will have a delicious meal ready in no time.

    Ingredients:

    1 1/2 lb ground beef (680 g)
    1 15 oz can kidney beans, rinsed and drained (425 g)
    1 8 oz can tomato sauce (227 g)
    2 tablespoons tomato paste (30 g)
    2 tablespoons chili powder (30 g)
    1 teaspoon garlic powder (3 g)
    1 teaspoon onion powder (3 g)
    1/2 teaspoon smoked paprika (2 g)
    Salt and black pepper to taste
    12 beef or turkey hot dogs
    3 1/2 cups shredded sharp cheddar cheese (400 g)

    Directions:

    1. Preheat your oven to 375°F (190°C) and lightly grease a 9×13 inch (23×33 cm) baking dish.
    2. In a large skillet, brown the ground beef over medium-high heat. Make sure to drain any excess fat to keep the casserole from becoming greasy.
    3. Once the beef is browned, add the tomato sauce, tomato paste, kidney beans, chili powder, garlic powder, onion powder, smoked paprika, salt, and black pepper. Stir everything together and let the mixture simmer for about 10 to 15 minutes. This allows the flavors to meld together beautifully.
    4. Spread the chili mixture evenly in the prepared baking dish. Use a spatula to make sure it is well distributed.
    5. Place the hot dogs vertically in the chili mixture. Ensure they are spaced evenly so that each serving has a portion of the hot dog.
    6. Sprinkle the shredded cheddar cheese evenly over the top of the casserole. Make sure to leave some of the tips of the hot dogs exposed.
    7. Bake the casserole in the preheated oven for 20 to 25 minutes. You want the cheese to be melted and lightly browned, while the hot dogs become blistered.
    8. Once done, remove the casserole from the oven and let it cool for about 5 minutes before slicing and serving. This will make it easier to cut and serve.

    How to serve Chili Cheese Dog Casserole

    Chili Cheese Dog Casserole is great served hot and straight from the oven. You can slice it into squares or rectangles and serve on individual plates. It pairs well with a side salad, cornbread, or tortilla chips. Feel free to top each serving with additional toppings like sour cream, chopped onions, or jalapenos for extra flavor. This dish is perfect for family dinners or casual gatherings, bringing everyone together over a satisfying meal.

    How to store Chili Cheese Dog Casserole

    If you have leftovers of Chili Cheese Dog Casserole, you can store them easily. Allow the casserole to cool completely before covering it with plastic wrap or aluminum foil. You can also transfer it to an airtight container. It will stay fresh in the refrigerator for up to 3 to 4 days. If you want to store it for a more extended time, consider freezing it. Cover it tightly with foil or place it in a freezer-safe container. It can last in the freezer for up to 3 months. To reheat, simply thaw in the fridge overnight and then warm it in the oven until heated through.

    Tips to make Chili Cheese Dog Casserole

    1. Use Lean Meat: Opt for lean ground beef or turkey to reduce fat content.
    2. Add Vegetables: To increase nutrition, consider adding chopped bell peppers, onions, or even corn to the chili mixture.
    3. Adjust Spice Levels: If you like some heat, add diced jalapenos or increase the chili powder.
    4. Experiment with Cheeses: While sharp cheddar is classic, you can try pepper jack cheese for a spicier kick or mozzarella for a milder flavor.
    5. Make it a Meal: Serve with a side of fresh vegetables or a garden salad for a more balanced meal.

    Variation (if any)

    Chili Cheese Dog Casserole can be customized in several ways. If you prefer a vegetarian version, substitute the ground beef with plant-based ground meat or lentils. You can also use chicken or pork hot dogs instead of beef or turkey for a different flavor. For a healthier twist, consider using turkey or chicken sausage and low-fat cheese. Switch up the flavor profile by adding your favorite spices or even a dash of hot sauce for more heat.

    FAQs

    Can I make this casserole ahead of time?
    Yes, you can prepare the chili mixture a day in advance. Just store it in the refrigerator, and when ready to bake, proceed with layering and baking.

    Can I use different beans?
    Absolutely! While kidney beans are used, you can replace them with black beans, pinto beans, or any beans you prefer.

    Can I scale this recipe?
    Yes, you can easily adjust the quantities of ingredients to feed more or fewer people. Just ensure that the baking dish size is appropriately adjusted.

    Is this recipe gluten-free?
    To make it gluten-free, check that the hot dogs and any other packaged ingredients are labeled gluten-free, as some products may contain gluten.

    How do I reheat leftovers?
    The best way to reheat leftovers is to place them in the oven at 350°F (175°C) for about 15-20 minutes or until warmed thoroughly. You can also microwave individual portions for quick reheating.

    By following this easy recipe, you will be able to create a delicious Chili Cheese Dog Casserole that is sure to impress family and friends alike. Enjoy your cooking!

    Nutritional Information (per serving, based on 8 servings)

    • Calories: 450
    • Protein: 24g
    • Carbohydrates: 28g
    • Dietary Fiber: 3g
    • Sugars: 3g
    • Fat: 30g
    • Saturated Fat: 14g
    • Cholesterol: 80mg
    • Sodium: 850mg

    With these delightful characteristics, you’ll find the Chili Cheese Dog Casserole is not just a meal, it’s a cherished recipe to gather around with loved ones.

  • Patty Melt with Minute Steak and Caramelized Onions

    Patty Melt with Minute Steak and Caramelized Onions

    The Patty Melt with Minute Steak and Caramelized Onions is a delightful twist on a classic American sandwich. This simple dish combines the flavors of juicy steak, sweet caramelized onions, and melted cheddar cheese, all tucked between crispy, buttery Texas toast. Perfect for lunch or dinner, the Patty Melt offers a satisfying meal that is both hearty and delicious. In this article, you will learn how to prepare this mouth-watering recipe, step by step.

    Why make this recipe

    There are many reasons to make a Patty Melt with Minute Steak and Caramelized Onions. First, it is a quick dish to prepare, making it an excellent choice for busy weekdays. Second, the combination of flavors is irresistible. The buttery toast, tender steak, and sweet onions create a perfect harmony that keeps you coming back for more. Lastly, this recipe is versatile. You can easily modify it to suit your taste or dietary needs. Making this dish for family or friends can easily impress them with a homemade meal that feels special yet is simple to prepare.

    How to make Patty Melt with Minute Steak and Caramelized Onions

    Follow these easy steps to create a delicious Patty Melt with Minute Steak and Caramelized Onions in your very own kitchen.

    Ingredients:

    • 1 pound (450 grams) Minute steak or cube steak
    • 1 cup (120 grams) Self-rising flour
    • 1 cup (240 ml) Whole milk or buttermilk
    • 1 teaspoon Salt
    • 1 teaspoon Black pepper
    • 1/4 cup (60 ml) Canola oil
    • 8 slices Texas toast
    • 1 cup (100 grams) Cheddar cheese, shredded
    • 1 large White onion
    • 2 tablespoons (30 grams) Butter

    Directions:

    1. Slice the white onion thin. Place the onion in a skillet over medium-low heat with a pat of butter. Cook slowly, stirring every few minutes until onions are soft, jammy, and deep golden. This process takes about 20 minutes.

    2. Pour the milk into a flat dish and place the self-rising flour into another dish. Dip each minute steak first in the milk, then in the flour, pressing lightly to coat thoroughly. Set the coated steaks on a plate until all steaks are covered.

    3. Heat canola oil in a large skillet over medium-high. When the oil shimmers, add the breaded steaks. Cook for two minutes per side until a deeply golden crust forms. Transfer the cooked steaks to a wire rack to stay crispy.

    4. Butter one side of each slice of Texas toast, making sure to lay the bread butter side out. Top each slice with a fried steak, a big handful of caramelized onions, followed by a slice of cheddar cheese. Place another slice of bread on top, butter side out.

    5. Heat a clean skillet or griddle over medium heat. Cook the sandwiches in batches, pressing gently until the bread is golden and the cheese melts. Flip and repeat until both sides have a crisp, buttery crust. Allow the sandwiches to rest for a minute, then slice and serve.

    How to serve Patty Melt with Minute Steak and Caramelized Onions

    Serve your Patty Melt with Minute Steak and Caramelized Onions while it is still warm. It pairs wonderfully with a side of crispy potato fries or a fresh salad for a nutritious meal. You can also add a dollop of tangy pickles or a side of your favorite dipping sauce for extra flavor. This sandwich is perfect for lunch, dinner, or even as a late-night snack.

    How to store Patty Melt with Minute Steak and Caramelized Onions

    If you have leftovers, store them in an airtight container in the refrigerator. These sandwiches can be kept for up to 3 days. To reheat, place the sandwiches in a skillet over medium-low heat, cooking until warmed through and the bread is crispy again. Avoid using the microwave, as it may make the bread soggy.

    Tips to make Patty Melt with Minute Steak and Caramelized Onions

    • For extra flavor, season the flour with spices like garlic powder, onion powder, or smoked paprika.
    • You can use other types of cheese like Swiss or provolone if cheddar is not available.
    • If you prefer a lighter version, grill the steaks instead of frying them, or consider using whole grain or low-calorie bread.
    • Make sure the onions are cooked slowly to develop their natural sweetness. Do not rush this step, as it is crucial for the flavor.

    Variation (if any)

    You can easily create variations of the Patty Melt with Minute Steak and Caramelized Onions. For a spicy version, add jalapeños or a dash of hot sauce to the onions. If you prefer a vegetarian option, replace the minute steak with grilled mushrooms or a plant-based patty. Creative substitutions can lead to delightful new flavors that maintain the spirit of the original recipe.

    FAQs

    Can I use a different type of meat for this recipe?
    Yes, you can use other types of steak, such as sirloin or flank steak. Just slice it thinly and adjust the cooking time accordingly.

    What if I don’t have self-rising flour?
    You can make your own self-rising flour by combining 1 cup of all-purpose flour with 1 1/2 teaspoons of baking powder and 1/2 teaspoon of salt.

    Can I freeze the leftovers?
    Yes, you can freeze the sandwiches. Wrap them tightly in aluminum foil or plastic wrap before placing them in a freezer-safe bag. To reheat, bake in the oven until heated through.

    Is there a way to make this recipe healthier?
    You can use whole-grain bread, reduce the amount of butter, and opt for leaner cuts of steak. Also, consider baking rather than frying the steaks for a lower-calorie meal.

    How can I make the caramelized onions faster?
    While slow cooking is best for flavor, you can increase the heat slightly to speed up the process. Just keep an eye on them to avoid burning.

    Nutritional Info

    • Serving Size: 1 Patty Melt
    • Calories: 560
    • Protein: 30g
    • Fat: 32g
    • Carbohydrates: 41g
    • Fiber: 2g
    • Sugar: 3g

    With its rich blend of flavors and simple preparation, the Patty Melt with Minute Steak and Caramelized Onions is a delightful meal that anyone can enjoy. Make it for lunch or dinner, and savor each bite of this homemade comfort food.

  • Beef Noodle Stir Fry

    Beef Noodle Stir Fry

    Welcome to the world of quick and delicious meals! Beef Noodle Stir Fry is a simple yet flavorful recipe that brings together tender beef and savory noodles in a delightful harmony of tastes. This dish is perfect for busy weeknights or whenever you crave a satisfying meal that can be prepared in minutes. With just a few fresh ingredients and some basic cooking techniques, you can whip up this tasty stir fry in no time.

    Why make this recipe

    Beef Noodle Stir Fry is an excellent choice for many reasons. First, it is quick and easy to prepare, making it ideal for those hectic days when you don’t have a lot of time to cook. Second, this recipe is versatile; you can customize it to suit your taste by adding different vegetables or adjusting the seasonings. Third, it’s packed with flavor from simple yet effective ingredients that you can find in any grocery store. Plus, it’s a one-pan meal, meaning less clean-up after you’re done. With so many benefits, making this stir fry is a great addition to your recipe collection.

    How to make Beef Noodle Stir Fry

    In this section, we will break down the process to make Beef Noodle Stir Fry. From gathering ingredients to serving, follow these easy steps to create a dish that your family will love.

    Ingredients:

    • 300 g noodles (udon, soba, or wheat noodles) (approximately 10.6 oz)
    • 400 g beef rump steak or flank steak (approximately 14.1 oz)
    • 3 tablespoons soy sauce
    • 1 tablespoon honey or brown sugar
    • 1 tablespoon rice vinegar or apple cider vinegar
    • 1 garlic clove, minced (optional)
    • 2 tablespoons oil (sunflower or sesame)
    • 1 teaspoon cornstarch
    • Salt and pepper to taste
    • 1 tablespoon sesame seeds (for garnish)
    • 1 green onion, finely chopped (for garnish)

    Directions:

    1. Start by slicing the beef into thin strips. Use a sharp knife for precise cuts. Lightly season the beef with salt and pepper.

    2. In a bowl, combine soy sauce, honey or brown sugar, rice vinegar, cornstarch, and minced garlic (if using). Whisk the mixture until well combined and set it aside.

    3. Heat oil in a wok or large skillet over medium-high heat. Once the oil is hot, quickly add the beef strips. Sear the beef until it turns golden, but make sure it remains tender. This step usually takes about 2-3 minutes. After cooking, remove the beef from the pan and set it aside.

    4. Cook the noodles according to package instructions, which typically take about 3-5 minutes. Once cooked, drain the noodles and rinse them quickly with cold water to stop the cooking process. This step ensures the noodles do not become too soft and mushy.

    5. Return the wok to medium heat and pour the sauce you prepared earlier into the pan. Allow it to heat and thicken slightly, which should take about 1-2 minutes.

    6. Add the seared beef strips back to the wok along with the drained noodles. Toss everything together to distribute the flavors evenly across the noodles and beef. It’s important to mix well to ensure every bite is delicious.

    7. Taste the mixture and adjust the seasoning if needed. If you like it saltier, you can add a bit more soy sauce.

    8. Transfer the Beef Noodle Stir Fry into serving bowls. Finally, sprinkle with sesame seeds and chopped green onions to add some color and crunch. Serve hot.

    How to serve Beef Noodle Stir Fry

    Beef Noodle Stir Fry is best served hot. Place the stir fry in deep bowls to enhance the eating experience. You can offer extra soy sauce on the side for those who may want to add additional flavor. This dish pairs well with a side of steamed vegetables or a fresh salad. If you like spice, consider serving with sriracha or chili sauce for an added kick.

    How to store Beef Noodle Stir Fry

    If you have leftover Beef Noodle Stir Fry, store it in an airtight container. Keep it in the refrigerator and consume it within 3 days for the best quality. To reheat, place the stir fry in a skillet over medium heat. Add a splash of water or broth to help revive the flavors and moisture. Stir until heated through. You can also reheat it in the microwave, covered with a lid, for about 1-2 minutes, stirring halfway through for even heating.

    Tips to make Beef Noodle Stir Fry

    1. Choose the right beef cut: For the best flavor and tenderness, use flank or rump steak. These cuts are ideal for quick cooking methods like stir-frying.

    2. Avoid overcooking the beef: Sear the beef just until it’s golden and no longer pink in the middle. Overcooking will make it tough.

    3. Prep ingredients ahead: To save time, prepare your ingredients ahead of time. Slice the beef and chop the vegetables before you start cooking.

    4. Customize the vegetables: Feel free to add vegetables like bell peppers, carrots, or broccoli for added nutrition and color.

    5. Use high heat: Stir-frying requires high heat to quickly cook the ingredients while keeping them tender. Make sure your wok or skillet is hot before adding the beef.

    Variation (if any)

    You can easily switch up this Beef Noodle Stir Fry recipe to match your personal preferences or what you have on hand. Here are a few variations:

    • Vegetarian: Substitute the beef with tofu or tempeh for a plant-based version. Use hoisin sauce for added flavor.
    • Seafood version: Try using shrimp or chicken instead of beef. Adjust cooking times accordingly since shrimp cooks faster than beef.
    • Extra veggies: Add a mix of vegetables like snap peas, bok choy, or mushrooms for a colorful and hearty dish.

    FAQs

    Q: Can I make this recipe gluten-free?
    A: Yes, you can substitute regular soy sauce with tamari or a gluten-free soy sauce.

    Q: What type of noodles work best?
    A: Udon, soba, or wheat noodles are all great choices. Choose what you prefer or what you have in the pantry.

    Q: Can I freeze Beef Noodle Stir Fry?
    A: It is not recommended to freeze because the noodles can become mushy when thawed. If you have leftovers, store them in the fridge instead.

    Q: How spicy is this dish?
    A: This basic recipe is not spicy. You can add chili sauce or red pepper flakes if you prefer a spicier version.

    Q: How many servings does this recipe make?
    A: This recipe makes about 4 servings, depending on portion sizes.

    Nutritional Info (per serving)

    • Calories: 450
    • Protein: 28 g
    • Total Fat: 18 g
    • Saturated Fat: 3 g
    • Carbohydrates: 45 g
    • Dietary Fiber: 2 g
    • Sugars: 5 g
    • Sodium: 800 mg

    Enjoy preparing and savoring your Beef Noodle Stir Fry! It’s a dish that the whole family can appreciate for its fast preparation and bold flavors. Happy cooking!

  • Cotton Candy Cheesecake

    Cotton Candy Cheesecake

    Cotton Candy Cheesecake is a delightful dessert that brings joy to any occasion. This unique cheesecake features a sweet, fluffy cotton candy flavor combined with the creamy richness of traditional cheesecake. It is perfect for birthdays, parties, or just a special treat at home. If you want to impress your guests and satisfy your sweet tooth, this recipe is an excellent choice. The vibrant colors and fun presentation make it an eye-catching dessert that everyone will love.

    Why make this recipe

    Making Cotton Candy Cheesecake is a fun and rewarding experience. This dessert combines the creamy, tangy taste of cheesecake with the whimsical sweetness of cotton candy. It is not only delicious but also visually appealing, making it ideal for celebrations. You can customize it with various toppings to give it a personal touch. Whether you are a seasoned baker or a beginner, this recipe is easy to follow and will yield impressive results. Plus, it offers a fantastic way to bring back childhood memories of fairgrounds and carnivals, making it a nostalgic treat for all ages.

    How to make Cotton Candy Cheesecake

    Creating a Cotton Candy Cheesecake is simple and straightforward. Follow the steps below to make this delightful dessert in your own kitchen. You’ll be surprised at how easy it is to create such a whimsical and delicious treat.

    Ingredients:

    • 1 ½ cups (150 g) graham cracker crumbs
    • ½ cup (100 g) granulated sugar
    • ⅓ cup (75 g) unsalted butter, melted
    • 4 (8-ounce) packages cream cheese, softened (900 g)
    • 1 cup (240 g) sour cream
    • 1 teaspoon (5 mL) vanilla extract
    • 4 large eggs
    • 2 teaspoons (10 mL) cotton candy flavoring or syrup
    • 1 cup (20 g) cotton candy
    • Sprinkles for decoration

    Directions:

    1. Preheat the oven to 325°F (160°C) and grease a nine-inch springform pan.
    2. In a bowl, mix the graham cracker crumbs, granulated sugar, and melted butter until moistened. Press the mixture into the bottom of the prepared pan and bake for about 10 minutes. Let it cool completely.
    3. In a separate bowl, beat the softened cream cheese with granulated sugar until creamy.
    4. Add sour cream and vanilla extract, and beat until smooth.
    5. Crack in eggs one at a time, mixing well after each addition.
    6. Add the cotton candy flavoring or syrup and blend until integrated.
    7. Pour the batter into the cooled crust and smooth the top.
    8. Place the filled pan on a rimmed baking sheet and bake for up to 60 minutes.
    9. Turn off the oven, crack the door open, and let the cheesecake cool inside for about an hour.
    10. Allow the cheesecake to reach room temperature before refrigerating for at least four hours or overnight.
    11. Before serving, decorate with fresh cotton candy and sprinkle with confetti or sprinkles.
    12. Run a knife around the edge of the springform pan to release and slice the cheesecake.

    How to serve Cotton Candy Cheesecake

    Serving Cotton Candy Cheesecake is just as fun as making it. Once your cheesecake is cool and decorated, slice it into pieces using a sharp knife. Place each slice on a plate garnished with a bit of extra cotton candy or colorful sprinkles for a festive touch. You can also serve it with whipped cream or fruit sauces, such as raspberry or strawberry sauce, for added flavor and a pop of color. Keep in mind that this cheesecake is best served chilled, so store any leftovers in the refrigerator until you are ready to indulge.

    How to store Cotton Candy Cheesecake

    To keep your Cotton Candy Cheesecake fresh, store it in the refrigerator. Wrap the cheesecake tightly with plastic wrap or aluminum foil or place it in an airtight container. This will help it stay moist and prevent any odors from the fridge from affecting its flavor. Your cheesecake should remain fresh for 3-5 days. If you want to store it for a longer period, consider freezing it. To freeze, wrap it well and place it in the freezer for up to 2 months. Thaw it in the refrigerator before serving.

    Tips to make Cotton Candy Cheesecake

    • Make sure the cream cheese is softened at room temperature. This will help it blend smoothly and create a creamy texture.
    • Don’t overmix the batter after adding the eggs. This can cause the cheesecake to crack during baking.
    • Be gentle when folding in ingredients, especially the cotton candy flavoring or syrup. This will help preserve its light texture.
    • Use high-quality cotton candy flavoring for the best taste. You can find this in specialty baking stores or online.
    • If you don’t have a springform pan, you can use a regular baking pan lined with parchment paper. Just ensure you can remove the cheesecake without damaging it.

    Variation (if any)

    While Cotton Candy Cheesecake is delicious as is, there are several variations you can try. For a fun twist, consider adding different flavorings, such as bubblegum or vanilla, to the cheesecake mix. You can also experiment with toppings; try adding a layer of fruit preserves or a drizzle of chocolate syrup. If you want a chocolate version, you can mix crushed chocolate cookies into the crust instead of graham crackers. Let your imagination run wild, and make this recipe your own!

    FAQs

    1. Can I use a different type of crust?

    Yes, you can use a different type of crust if you prefer. Cookie crusts, such as Oreo or vanilla wafer, work well for this recipe.

    2. Is there a dairy-free version of Cotton Candy Cheesecake?

    You can substitute dairy products with vegan alternatives, like dairy-free cream cheese and yogurt. Make sure to use a plant-based butter for the crust.

    3. How can I make this cheesecake gluten-free?

    To make this cheesecake gluten-free, use gluten-free graham crackers or a gluten-free cookie for the crust.

    4. Can I make this cheesecake ahead of time?

    Yes, Cotton Candy Cheesecake can be made ahead of time. It’s best to allow the cheesecake to chill overnight for the best flavor.

    5. Why did my cheesecake crack?

    Cheesecakes can crack if they are overmixed or baked at too high a temperature. Always bake at a low temperature and avoid overmixing the batter once the eggs are added.

    Nutritional Information (per serving, makes 12 servings)

    • Calories: 340
    • Total Fat: 22g
    • Saturated Fat: 13g
    • Cholesterol: 95mg
    • Sodium: 200mg
    • Total Carbohydrates: 30g
    • Dietary Fiber: 1g
    • Sugars: 20g
    • Protein: 5g

    Enjoy making your Cotton Candy Cheesecake and sharing this whimsical treat with family and friends! With its sweet flavors and creamy texture, it’s sure to be a hit at any gathering. Happy baking!

  • Christmas Style Steak Posole

    Christmas Style Steak Posole

    Christmas Style Steak Posole is a warm, hearty dish perfect for the holiday season. It combines savory steak, hominy, and flavorful spices to create a soup that warms you from the inside out. This recipe offers a unique twist on traditional posole, making it a wonderful addition to your festive menu. You can enjoy this dish with family and friends, bringing everyone together during the most wonderful time of the year.

    Posole, a traditional Mexican dish, usually features hominy, a type of corn treated to remove the hull. It’s often served with meats and can be customized with various toppings. This Christmas Style Steak Posole recipe enhances the classic flavors with the addition of green and red chiles, allowing you to experience a blend of festive flavors.

    Why make this recipe

    You should make Christmas Style Steak Posole for several reasons. First, it is warm and comforting, making it ideal for chilly winter months. Second, it is a crowd-pleaser, and great for serving during holiday gatherings. The robust flavors and tender steak will make it a favorite among your guests. Moreover, preparing posole allows you to explore traditional Mexican cooking techniques while adapting them to your holiday menu. Plus, you can easily make it ahead of time, leaving more time for you to enjoy the celebrations with loved ones.

    This recipe is not only delicious; it also offers health benefits. Using lean steak provides protein, while hominy is a great source of fiber and vitamins. The green chiles add an extra kick of spice and contain antioxidants. Overall, Christmas Style Steak Posole is a nourishing dish that will make your home feel festive and filled with warmth.

    How to make Christmas Style Steak Posole

    Making Christmas Style Steak Posole is straightforward and requires only a few essential steps. With each step, you will soon have a tasty dish simmering on the stove. Follow this guide carefully, and you will create a delightful meal that everyone will enjoy.

    Ingredients:

    • 5-6 pounds steak cut in large chunks (2.3-2.7 kg)
    • 1 cup carrots, chopped (150 g)
    • 2 tablespoons salt (30 g)
    • 1 tablespoon garlic, chopped (8 g)
    • 28 oz green chile (792 g)
    • 1 tablespoon red chile powder (7 g)
    • 48 ounces canned or fresh hominy (1360 g)
    • Diced onions (optional for garnish)
    • Oregano (optional for garnish)

    Directions:

    1. Begin by adding the steak to a large Dutch oven. Pour in enough water to cover the meat, leaving a couple of inches from the top. This helps prevent boiling over during cooking.

    2. Next, sprinkle in the salt and chopped garlic. These ingredients will contribute great flavor to the broth.

    3. Bring the mixture to a boil over high heat. Once boiling, reduce the heat slightly. Let it simmer for 3 to 4 hours. It’s essential to keep a close eye on the pot during this time. If the water starts to boil over, adjust the heat to maintain a gentle simmer.

    4. As the soup cooks, water may evaporate. Be sure to add water periodically, so the meat continues to be covered. This will ensure that it stays moist and tender.

    5. When the steak becomes tender, remove it from the pot. Use two forks to shred the meat, discarding any excess fat. Alternatively, you could cut the meat into bite-sized chunks if you prefer a different texture.

    6. Now, add the green chile and red chile powder to the pot. These ingredients will enhance the flavor profile of your posole.

    7. Stir in the hominy, which gives the dish its characteristic texture and heartiness.

    8. Let everything cook together for an additional 30 to 40 minutes. This allows the flavors to meld and deepen.

    9. Taste your soup and add more salt if needed. Seasoning is critical for achieving the perfect balance of flavors.

    10. If desired, serve your Christmas Style Steak Posole with diced onions and oregano as garnishes. They can brighten up the flavors and presentation of the dish.

    How to serve Christmas Style Steak Posole

    When serving Christmas Style Steak Posole, use large bowls to allow room for toppings and garnishes. Ladle the steaming soup into the bowls and let your guests embellish their portions with diced onions and oregano according to their taste. Offer crispy tortilla chips or warm corn tortillas on the side for added texture and enjoyment. This meal works wonderfully as the main dish during festive celebrations, accompanied by a fresh salad or simple rice if desired.

    How to store Christmas Style Steak Posole

    If you have leftover Christmas Style Steak Posole, it stores very well. Place the cooled soup in airtight containers. It can remain in the fridge for up to 3-4 days. When reheating, add a bit of water or broth to bring back the soup’s original consistency.

    For longer storage, you can freeze the posole. It holds up in the freezer for up to 3 months. To reheat, simply let it thaw overnight in the refrigerator and warm it on the stove over low heat until heated through.

    Tips to make Christmas Style Steak Posole

    1. Choose the Right Cut of Steak: Use cuts like chuck or brisket, as these will become tender after several hours of cooking.

    2. Customize the Spice Level: If you prefer a milder soup, you can reduce the amount of green chile and red chile powder. Enhance flavors gradually to ensure it fits your preference.

    3. Make Ahead: This dish can be made a day ahead of time. The flavors will deepen and improve overnight in the fridge.

    4. Add More Vegetables: You can add other vegetables such as bell peppers or zucchini for an extra dose of nutrition.

    5. Thicken the Soup: If you like a thicker consistency, blend a portion of the hominy and then return it to the pot.

    Variation (if any)

    If you want a variation, you can try using a different protein like pork or chicken. Each alternative will create a unique flavor profile while maintaining the essences of traditional posole. You could also explore vegetarian versions by substituting meat with beans or mushrooms while keeping the hominy and spices intact.

    FAQs

    Q: Can I use fresh hominy instead of canned?
    A: Yes, using fresh hominy works beautifully. Simply cook it according to package directions before adding it to your posole.

    Q: Is this recipe spicy?
    A: The spiciness depends on the type and amount of chiles you use. Adjust according to your heat preference.

    Q: Can I store leftovers?
    A: Yes, you can store leftovers in the fridge for up to 4 days or freeze for up to 3 months.

    Q: What can I serve with posole?
    A: Posole is hearty enough on its own, but you can serve it with tortilla chips, bread, or a salad for a complete meal.

    Q: How long does this dish last?
    A: When stored properly, Christmas Style Steak Posole can last in the refrigerator for 3-4 days and in the freezer for up to 3 months.

    Nutritional Information (per serving)

    • Calories: 450
    • Protein: 30g
    • Fat: 20g
    • Carbohydrates: 40g
    • Fiber: 6g
    • Sodium: 800mg

    Enjoy this delightful holiday recipe that captures the warmth of Christmas while bringing family and friends together in a festive atmosphere. With these simple steps, you are on your way to creating a memorable dish that everyone will cherish.

  • Sourdough Grilled Cheese with Guacamole and Bacon

    Sourdough Grilled Cheese with Guacamole and Bacon

    Sourdough Grilled Cheese with Guacamole and Bacon is not your average grilled cheese sandwich. It combines the tangy flavor of sourdough bread with creamy guacamole, crispy bacon, and melty cheese. This innovative twist on a classic comfort food adds a unique mix of textures and flavors. Whether you crave a quick lunch or a satisfying dinner treat, this sandwich is sure to please.

    In this article, you will discover how to make this delicious Sourdough Grilled Cheese with Guacamole and Bacon, learn about its benefits, and find answers to common questions.

    Why make this recipe

    Making Sourdough Grilled Cheese with Guacamole and Bacon is beneficial for several reasons. First, it is quick and easy, taking less than 30 minutes from start to finish. This makes it perfect for busy weeknights or lazy weekends. Second, it is satisfying and comforting, combining rich flavors that can elevate any meal.

    Additionally, this recipe gives you the chance to enjoy classic flavors while adding a few twists. The crispy bacon adds crunch while the guacamole provides creaminess. Lastly, using sourdough bread offers a unique taste that is both tangy and hearty. The combination of these ingredients makes every bite feel special.

    How to make Sourdough Grilled Cheese with Guacamole and Bacon

    To make Sourdough Grilled Cheese with Guacamole and Bacon, follow these simple steps.

    Ingredients:

    • 2 slices sourdough bread (about 70 grams per slice)
    • 1 cup Colby Jack cheese, shredded (about 100 grams)
    • 2 tablespoons salted butter (about 30 grams)
    • ½ cup guacamole (about 120 grams)
    • 4 slices bacon, cooked and crumbled (about 120 grams)
    • ¼ cup tortilla chips, crushed (about 30 grams)

    Directions:

    1. Prepare Your Skillet: Set a skillet over medium heat. This will be your cooking surface for the grilled cheese.

    2. Butter the Bread: Spread butter on one side of each slice of sourdough bread. Make sure the butter coats the bread evenly. This will help it achieve a golden brown color when grilled.

    3. Build the Sandwich: Lay one slice of bread butter side down in the skillet. Start layering the ingredients. First, add half the shredded Colby Jack cheese. Next, spread the guacamole on top of the cheese. Sprinkle the crumbled bacon over the guacamole. Then, add the crushed tortilla chips for an extra crunchy texture. Finally, top it off with the remaining cheese.

    4. Top with Second Slice: Place the second slice of sourdough bread on top, ensuring the buttered side is facing up.

    5. Grill the Sandwich: Grill the sandwich for about two to four minutes on one side. Check the bread for a golden brown color. Carefully flip the sandwich and grill the other side for another two to four minutes. You want both sides browned and the cheese melted.

    6. Slice and Serve: Once grilled, remove the sandwich from the skillet. Let it cool for a minute, then slice it in half. This step helps the cheese settle and keeps the filling from spilling out. Serve immediately for the best experience.

    How to serve Sourdough Grilled Cheese with Guacamole and Bacon

    You can enjoy Sourdough Grilled Cheese with Guacamole and Bacon as a main course or snack. It pairs well with a light side salad, tomato soup, or potato chips for extra crunch. You can also serve it with a dollop of sour cream or salsa on the side for added flavor. This makes for a well-rounded meal that satisfies both cravings and nutritional needs.

    How to store Sourdough Grilled Cheese with Guacamole and Bacon

    If you have any leftovers, you can store Sourdough Grilled Cheese with Guacamole and Bacon in an airtight container in the refrigerator. It’s best to consume it within two days for the freshest taste. When reheating, consider using a skillet over low heat. This method helps retain the sandwich’s crispiness while ensuring the cheese melts again.

    Do not freeze this sandwich, as the guacamole and cheese may change texture when thawed.

    Tips to make Sourdough Grilled Cheese with Guacamole and Bacon

    • Use Fresh Ingredients: Fresh bacon, ripe avocados for guacamole, and high-quality cheese will enhance the flavor of your sandwich.
    • Experiment with Cheese: While Colby Jack is delicious, you can try other cheeses like cheddar or Monterey Jack for different flavors.
    • Add Vegetables: Incorporate sliced tomatoes or jalapeños for extra flavor and nutrition.
    • Grill on Low Heat: Cooking on lower heat allows your bread to brown evenly without burning while the cheese melts nicely.
    • Customize Texture: Adjust the amount of crushed tortilla chips in the sandwich based on your preference for crunch.

    Variation (if any)

    You can alter this recipe by switching out some ingredients. For a vegetarian version, skip the bacon and add sautéed mushrooms or spinach. You might also consider using different spreads like pesto or hummus instead of guacamole for distinct flavors.

    For a spicier version, add slices of jalapeños or a drizzle of hot sauce inside the sandwich. Feel free to adjust ingredients to cater to your taste preferences!

    FAQs

    1. Can I use different bread?
    Yes, while sourdough is recommended for its unique flavor, you can use any bread you prefer, like whole wheat or white bread.

    2. How can I make guacamole from scratch?
    To make quick guacamole, mash ripe avocados in a bowl, then mix in lime juice, chopped cilantro, diced tomatoes, and salt to taste.

    3. Can I use turkey bacon instead?
    Absolutely! Turkey bacon is a healthier option and works well in this recipe.

    4. Is this sandwich suitable for children?
    Yes, most children enjoy grilled cheese, bacon, and guacamole. Just serve smaller portions and ensure they are comfortable with the flavors.

    5. Can I prepare this in advance?
    It’s best to make Sourdough Grilled Cheese with Guacamole and Bacon fresh. However, you can prepare the guacamole and cook the bacon in advance for a quicker assembly.

    Nutritional Information:

    • Calories: 600
    • Protein: 25g
    • Carbohydrates: 30g
    • Fat: 45g
    • Sodium: 800mg

    Now you are ready to enjoy a delightful Sourdough Grilled Cheese with Guacamole and Bacon. This recipe offers a simple yet tasty twist on a classic, perfect for any sandwich lover. Happy cooking!