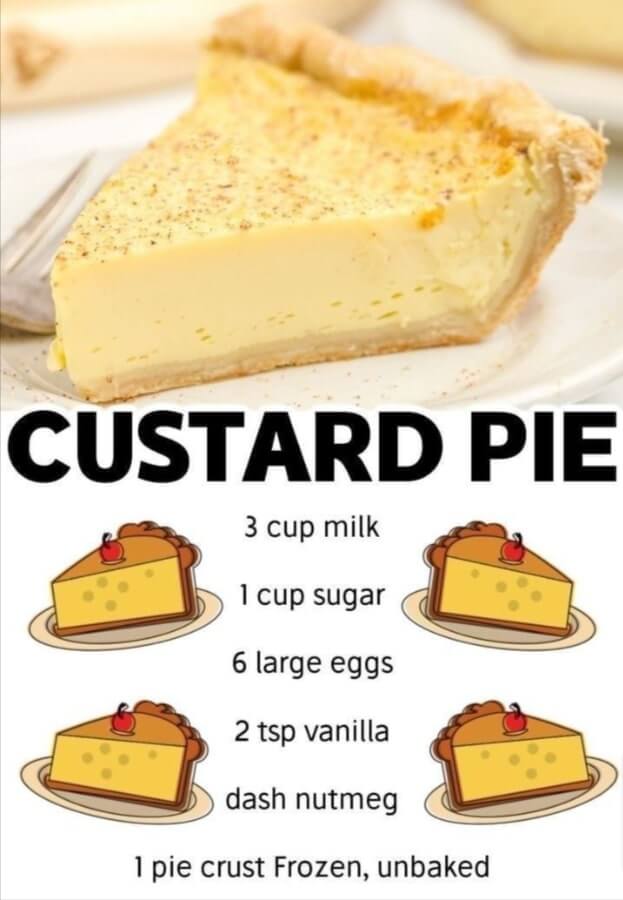
Honey BBQ Meatloaf Recipe
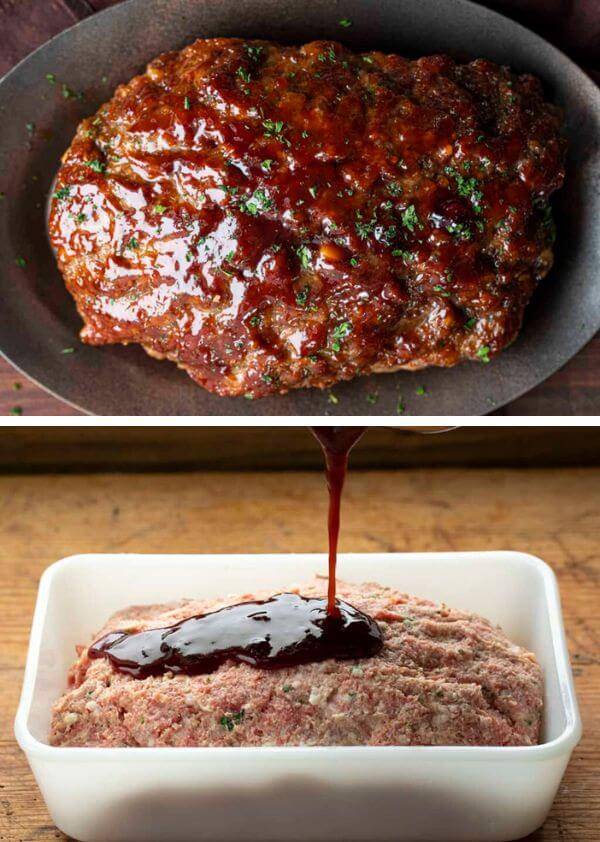
If you’re on the hunt for an exceptional, mouthwatering dish that combines the rich flavors of meatloaf with the sweet and tangy goodness of honey barbecue sauce, you’ve come to the right place. Our Honey BBQ Meatloaf is a true culinary masterpiece that will leave your taste buds dancing and your guests begging for seconds. … Read more